Create an area
Once you’ve connected your devices via an integration, the next step is to group them into an area. unawair evaluates each area every 10 minutes and controls its ACs accordingly. This page walks through the area modal one screen at a time.
For the concept of an “area” itself, see What is an area. For how to pick the upper and lower bounds, see Comfort range.
Prerequisites
Section titled “Prerequisites”- You’ve finished Integration and both your thermometers and ACs appear on the Devices screen.
- If they don’t show up there, they won’t be candidates inside the area modal either. Finish the integration first.
Step 1: Open the area modal
Section titled “Step 1: Open the area modal”Open the dashboard.
- If you have zero areas: a “Create the first area” button is shown in the centre of the page.
- If you already have one or more areas: a + Add link sits to the right of the “My areas” heading.
Either of them opens the area modal (titled Create area).
Step 2: Name the area
Section titled “Step 2: Name the area”The Name field starts with “Living room”. The name is used as-is on the dashboard and in notifications, so if you plan to create multiple areas, pick a physical room name to keep them straight (e.g. Bedroom, Office, Kid’s room).
Step 3: Pick thermometers (Meter tab)
Section titled “Step 3: Pick thermometers (Meter tab)”The modal has three tabs: Meter / Rule / AC. A fresh area starts on the Meter tab.
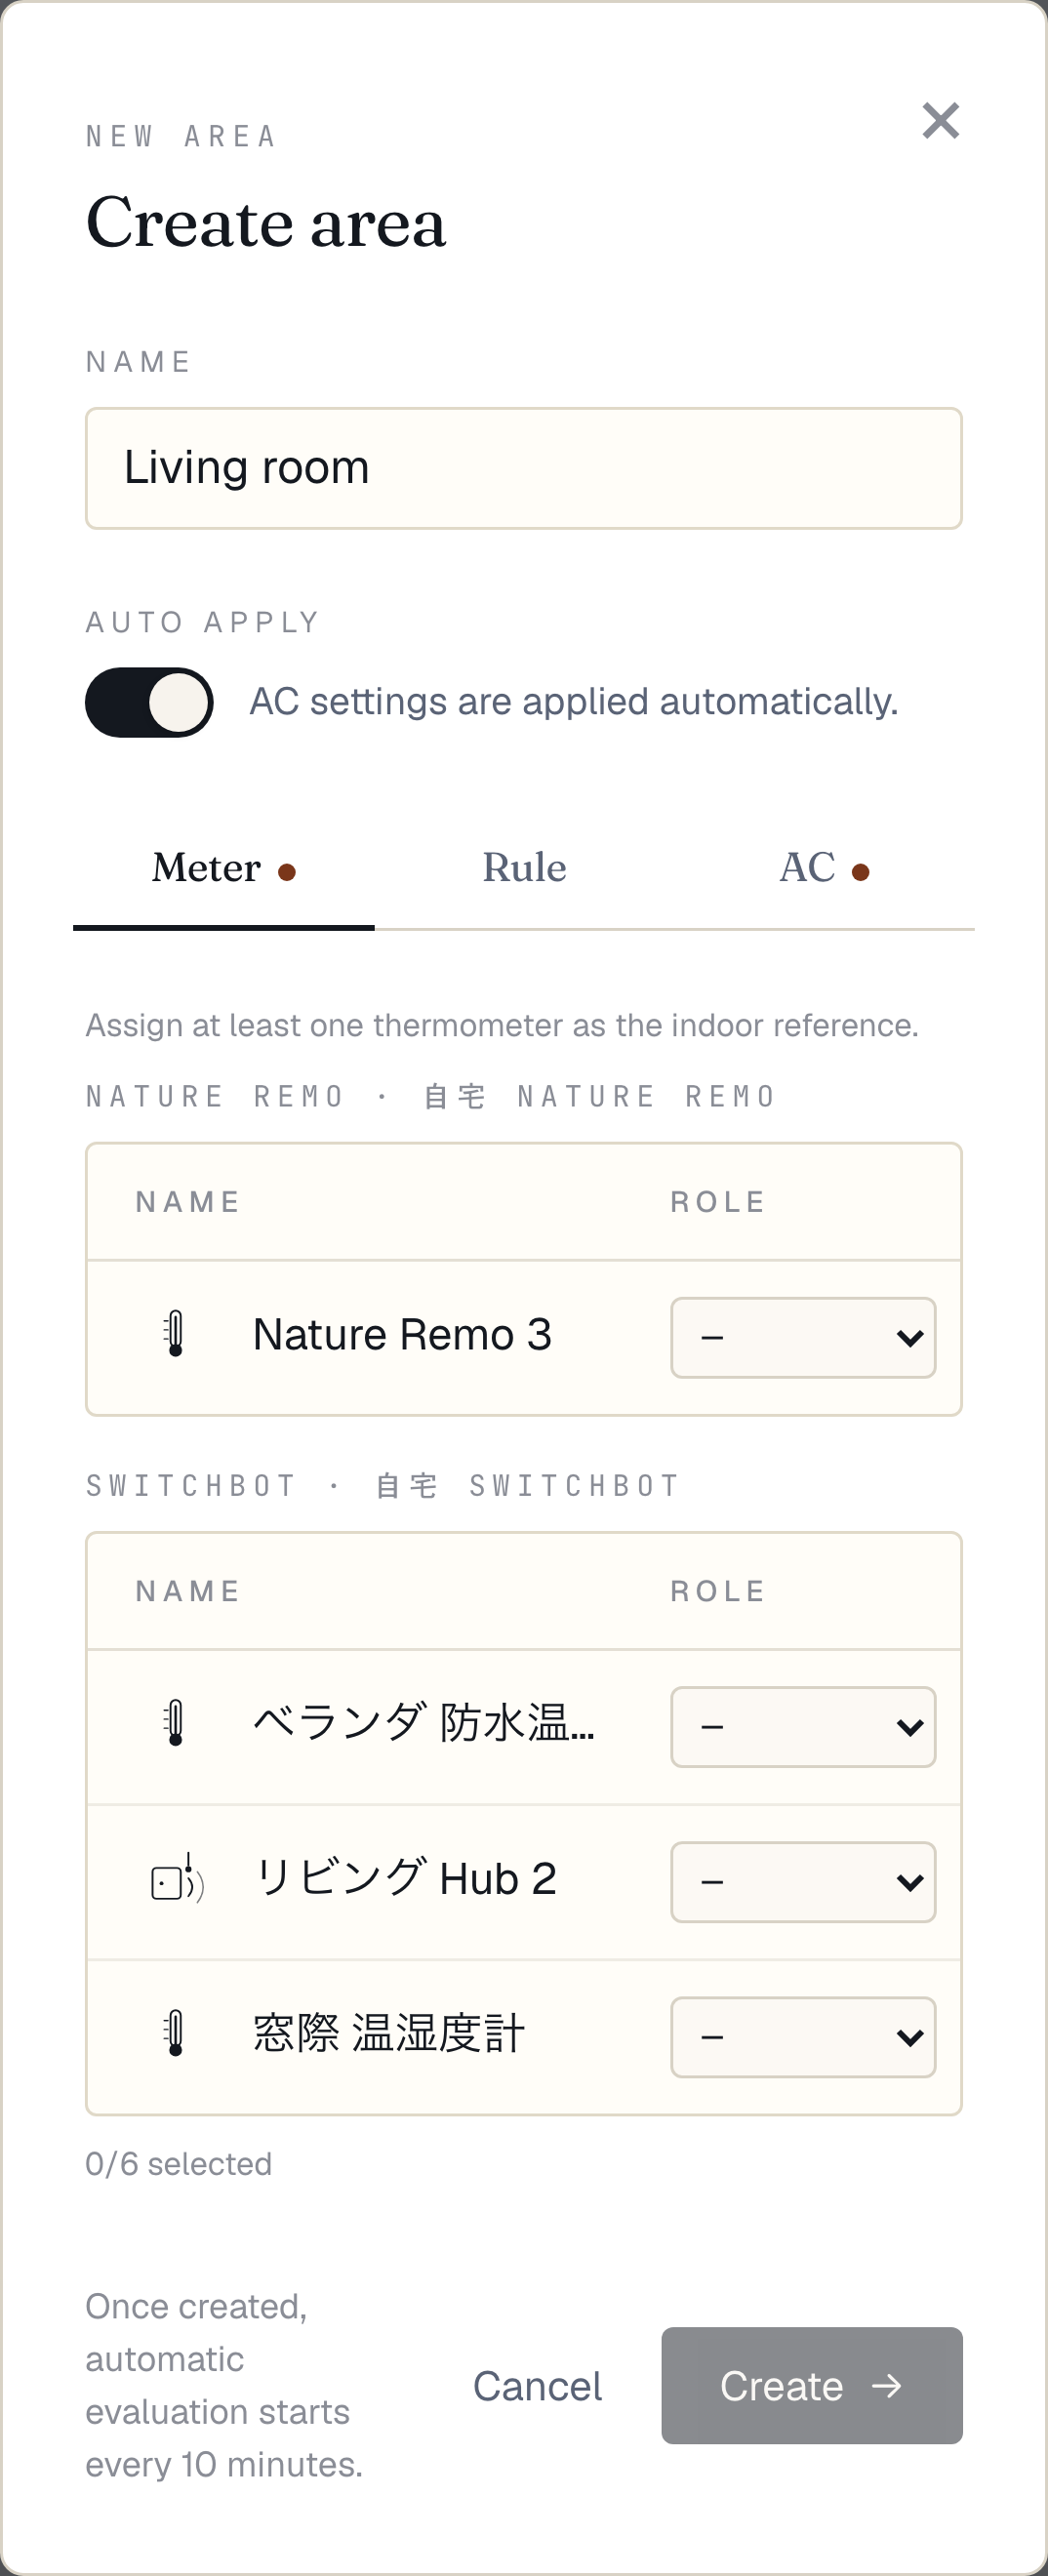
Your connected devices are grouped by vendor. For each one, assign a role:
| Role | Purpose |
|---|---|
| Indoor | Used as the area’s room temperature for control decisions. At least one is required. If you assign multiple, their latest readings are averaged into a single “room temperature” for the area. |
| Outdoor | Outdoor reference, recorded but not used for control. It’s overlaid on the temperature chart. |
| Near AC (acroom) | A thermometer close to the AC unit (near the outlet, etc.). These readings are skewed by direct airflow, so unawair logs them but doesn’t use them for control. |
| Off | Don’t use this thermometer in this area. |
You can assign up to 6 thermometers. If no thermometer is set to “Indoor”, the Meter tab gets a red dot and the Create button stays disabled.
Step 4: Set the comfort range (Rule tab)
Section titled “Step 4: Set the comfort range (Rule tab)”On the Rule tab, pick the upper and lower bounds of the comfort range. The left side shows a three-zone visualiser (cool / comfort / heat). Changing the dropdowns on the right resizes the bands in real time.

- Values snap to 0.5°C steps
- Min and max must be at least 1.5°C apart (prevents thrashing between cool and heat at the boundary).
For how to pick the actual numbers, see Comfort range.
Step 5: Pick ACs (AC tab)
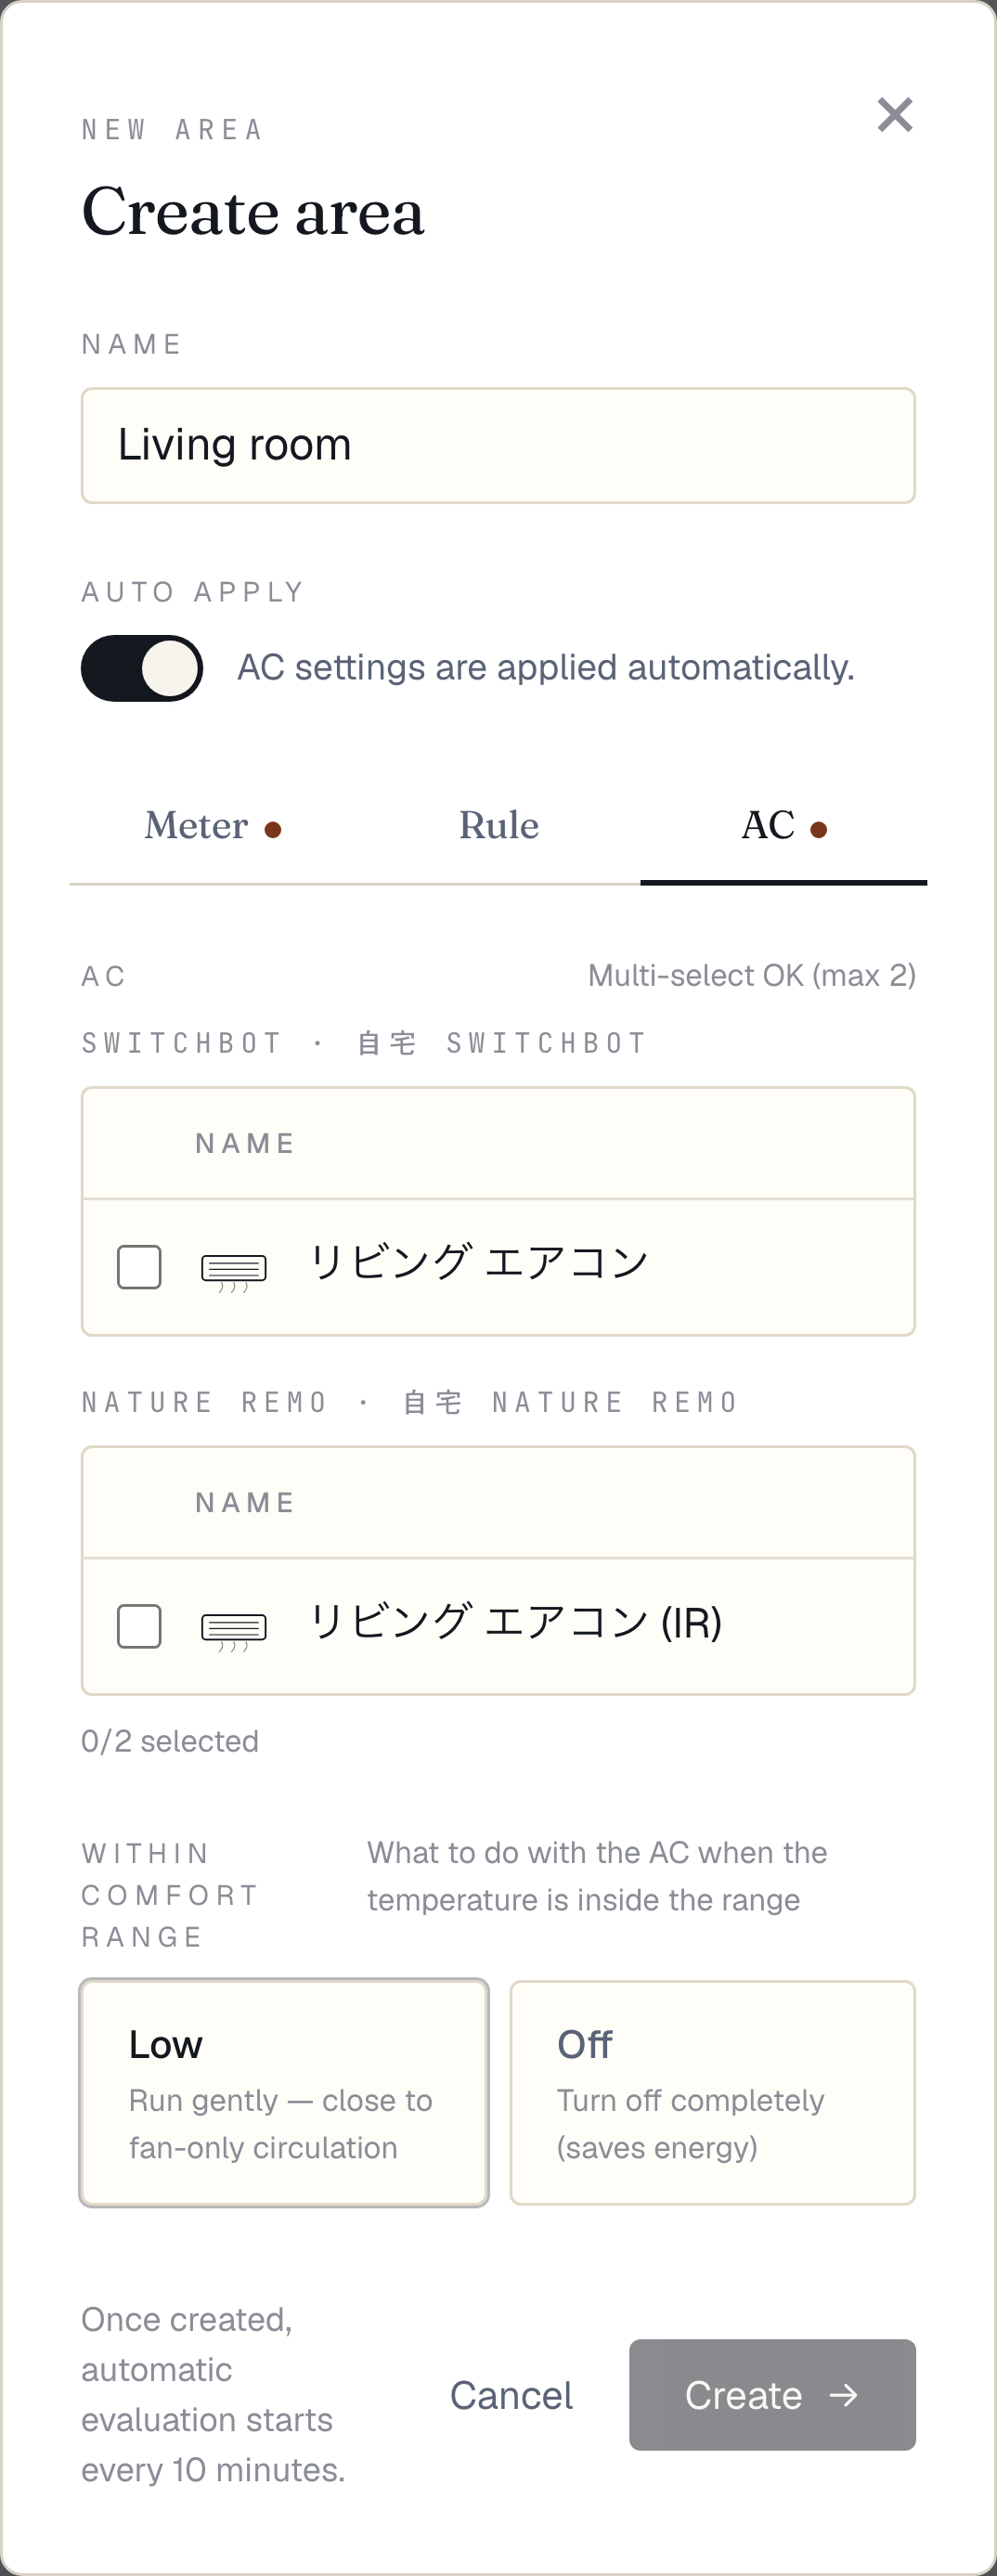
Section titled “Step 5: Pick ACs (AC tab)”Switch to the AC tab and select the ACs this area will control. Up to 2 ACs can be added, and they can come from different vendors.
Within comfort range
Section titled “Within comfort range”How the AC should behave while temperature stays inside the range:
- Low: run the AC gently — close to fan-only circulation.
- Off: stop the AC entirely (saves energy).
Control mode (only when 2+ ACs selected)
Section titled “Control mode (only when 2+ ACs selected)”If you select two or more ACs, a Control mode picker appears:
- Send to all: send the same command to every selected AC at once. Use this when the ACs are physically distinct units controlling separate spaces.
- Rotate: alternate which AC receives the command each tick, and fall over to the other on failure. Designed for the case where the same physical AC is registered under two different vendors (failover).
“Rotate” is only selectable when the two ACs come from different vendors — a same-vendor failover would hit the same API outage, so it isn’t useful.
Step 6: Toggle Auto apply
Section titled “Step 6: Toggle Auto apply”The Auto apply toggle at the top of the modal decides whether the area starts driving the AC right after creation.
- On: from the next tick (within 10 minutes), commands start being sent to the AC.
- Off: the area is created, but unawair only records its decisions — it doesn’t send any commands.
If you haven’t subscribed yet, the toggle is disabled (it re-enables after you subscribe).
Step 7: Create
Section titled “Step 7: Create”Press the Create button in the bottom-right. The button stays disabled until all of the following are true:
- At least one thermometer is assigned the Indoor role.
- At least one AC is selected.
- Min and max are at least 1.5°C apart.
On success the modal closes and the new area appears in your dashboard. If Auto apply was on, control starts from the next tick.
Next steps
Section titled “Next steps”- Comfort range — how to choose the bounds and fine-tune them.
- If something doesn’t work as expected, see FAQ.